Angel Oak, Johns Island, SC—This massive tree is a tourist attraction, but none the less, one of the most photogenic live oak trees in the area. It’s easy to get lost in all of the green and brown in color, but in infrared, it was easy to separate tones to truly show the spread and rhythm of this great tree. The longest branch is 180 feet long. For scale, there is a car parked to the left of the base, about 50 feet away.
The Other World of Infrared Photography
I remember the first infrared image that captured my imagination. It was when I was ten years old and in the fourth grade. I saw a LIFE magazine with red palm trees on the cover. This was before Photoshop®. There was always a photo caption in those magazines. I read that the image was color infrared, which I learned renders greens as reds. Many years went by, as I didn’t get to a photography career until age 44, but I never forgot the excitement of seeing that first color infrared image.
After researching color infrared film processing, I decided to start with B&W infrared. I was set up to process B&W film and BW infrared could be processed in the same tank. It was more convenient and much easier to process (in the wet darkroom in those days).
When digital came in, it took a few years for conversion companies to begin switching out sensors to get an infrared camera. At that time, I got my first digital infrared converted, a Nikon D200.
Let’s have a look at several discussion points, infrared properties, and image examples.
Why would one choose to shoot infrared?
#1: It’s Different
The number of good photographers and outstanding images makes finding a new and exciting way to self-expression a bit daunting. It’s easy to give up, thinking that everything has been done. This is a common path to cynicism, which can be stifling to creativity and to “out of the box” thinking. Even with its growing popularity, infrared is still in the margins. However, B&W infrared is an interesting look, different, and popular with fine art photographers and galleries.
#2: Shooting Times
A common misconception is that infrared is the domain of bright sun and trees with full green leaves. Although, it’s true that the aforementioned is a great situation, it is only one of many viable conditions. I photograph infrared at dawn/early morning, late afternoon/dusk, bright overcast/ dark overcast, in the rain, in fog, mist, midday, and during a full moon.
#3: Qualities of Light
Front light — Light source is behind you
Side light — Light source 90 degrees to the right/ left
Backlight — Light source is behind the subject
Top light — Noon
Overcast/ diffused — Soft light spreading evenly over the subject
Rain — An unexpected time for infrared. Bright overcast/ soft drizzle, and just after a storm are both excellent times for infrared.
Fog — Bright/ crisp early morning fog is outstanding
●●● Low angle front and side light can be quite dramatic in IR.
#4: Ethereal/Surreal Look
One of the great appeals of infrared photography is what many people refer to as the “other worldly” look. Infrared is literally re-visualizing your world
#5: Compared to B&W Photography
Infrared can capture greater cloud detail (not visible to the naked eye), and naturally adds glow to highlights.
Hardware/Software Conversions
You can dedicate a camera to be an infrared camera by getting an infrared filter installed by a company specializing in infrared conversions (http://kolarivision.com and http://lifepixel.com)
What do the number designations mean?
- 590nm and 650nm — The lower the number (nm = nanometers) the closer to the visible light spectrum and the easier it to introduce color. Advantages: ability to introduce faux color, softer blacks.
- 720nm (Standard infrared) — Creates high contrast black and white infrared, yielding puffy white clouds and dark skies. Advantage: Creates high impact, black blacks, and white whites.
- 830nm — Higher contrast than 720nm. Best used in flat or subdued light conditions. Advantage: Increases contrast on low contrast days.
- Full Spectrum — Basically, a clear filter is inserted in the camera allowing you to add external infrared filters on your lens to achieve any and more of the aforementioned designations: 590 filter, 650 filter, 720 filter, and 830 filter. You will have to purchase each filter separately. NOTE: The eye piece is blacked out when using filters. Live view is essential. Recommended for mirrorless cameras.
Singh Ray 690 infrared filter — Designed to be used on a color camera to create true B&W infrared images. Note: The exposure time will be a little longer than on a converted camera.
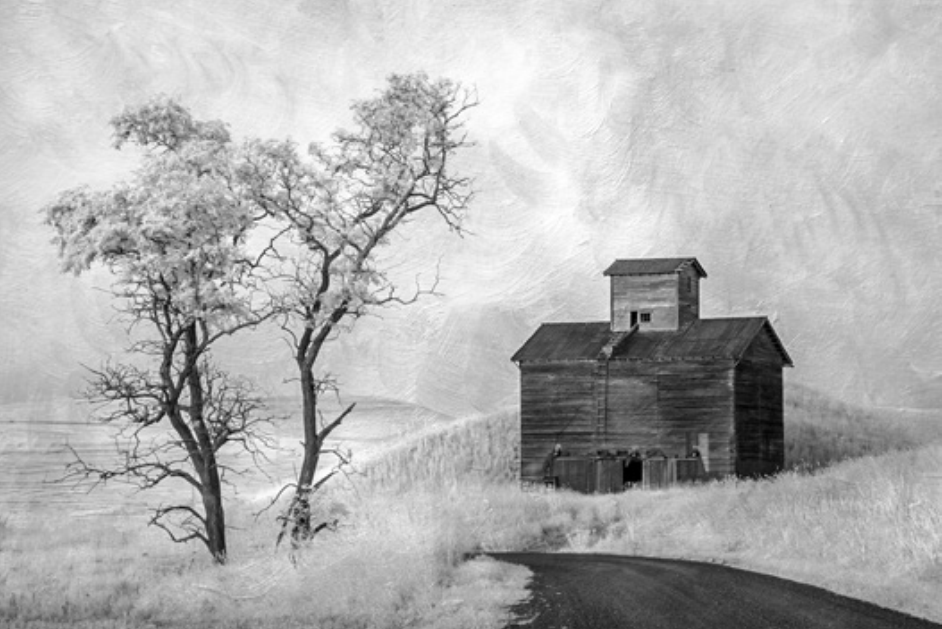
Backroad Barn, Eastern WA State — Normally, clouds are desirable, but blank skies, as in this image, can give us a clean palette for texturing
Here’s the way it works:
All sensors have a hot mirror to block infrared for cleaner/ sharper images. However, all hot mirrors leak small quantities of infrared. It takes time to gather enough infrared leakage to create an image. Hence, a normal exposure of 1/30 sec may result in a 2 second exposure. Exposure times will vary greatly depending on the amount of light. You can raise the ISO and lower the aperture for a faster exposure using the filter. But, you will need Live View as the eyepiece will be blacked out when the filter is added.
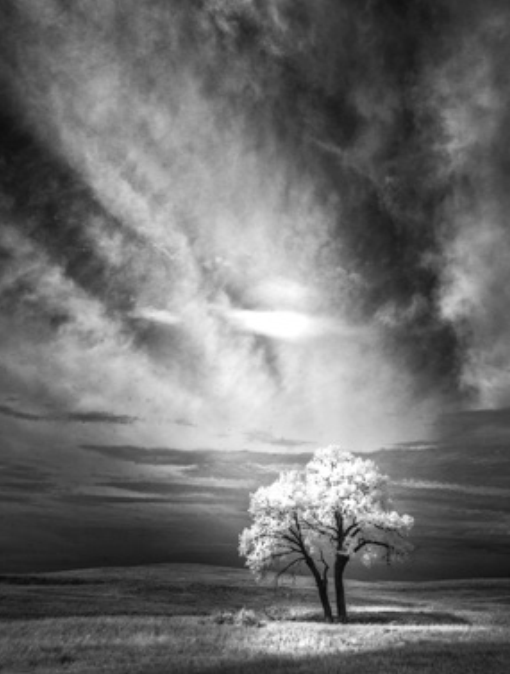
Spot light, Badlands NP, SD — A single ray of light spot lights this single cottonwood tree, the effect enhanced by the use of a radial filter, bringing out the tree and single cloud and darkening the edges.
Focusing
There is slight disparity between the normal focusing point and the infrared focusing point. Live view focusing AF is more accurate than thru the eye piece focusing. However, the disparity is small enough that stopping down to f/16 or f/22 will cover the difference. As a general practice, we focus through live view on our DSLRs.

Underwater Ballet, Acadia National Park, ME — The underwater stems were pronounced by the infrared, causing me to change the subject focus from the lily pads to the undercurrent of the flowing stems.
Lenses and Hot Spots
This is a known issue and there are lists of lenses that create the hot spot, which is a bright spot (BW infrared) or a discolored spot (color infrared) in the center of your infrared image. The intensity of the hot spot can be more pronounced at higher apertures.
In addition to the list of incompatible lenses, you can easily determine if a lens creates the hot spot by taking a properly exposed image of a clear blue sky, using several different apertures. The hot spot will be visible on incompatible lenses, and not there on compatible lenses.
If you currently have images with the hot spot, it can possibly be corrected. Depending on the image, the hot spot can be fixed in many cases by adding contrast by any number of techniques: NIk’s Viveza (now owned by DxO), brush contrast in the area, try the burn tool and cloning at a very low opacity. It is a time-consuming process.
The easiest fix is to have a compatible lens.

Time Warp, Badlands National Park, SD — The long exposure and spires exemplify what many refer to as “the otherworldly look” of infrared. I needed 15 stops of neutral density to achieve the 4-minute exposure in the late morning light.
Processing
What is that red cast?
The red cast shows up on the image on back of the camera and when imported. It has no effect on the infrared image, but can be a bit distracting when viewing on the camera. If you would rather see your images in infrared on the camera, you can go into your respective camera menu and choose to view in monochrome. However, the image will still input with the color cast, which quickly goes to infrared when processed as B&W.
My Infrared Set Up
Main Camera: Nikon D800 converted to standard infrared, 720nm
Second Camera: D800 converted to 590nm, which enables introducing color into the image.
I use a Singh Ray 690 infrared filter* which has two functions:
It can be added to a color camera to create a true BW infrared.
- Image. The exposure can be a bit longer, depending on the ambient light. However, in bright sunlight, the exposures are shorter
- The way that I use this filter to the greatest effect is to take a color and infrared image of the same scene (tripod needed), have both images open as layers in Photoshop, then adjust the opacity. Consider masking in / out certain areas. It’s pretty much up to you at that point.

Arnistapi, Westfjords, Iceland — Photographed from the pier, this is a favorite image from this area. The low tide opens up a wonderful, large boulder foreground, lush with kelp, which renders glowing white in infrared.
Is a tripod always needed?
No, not always.
If the exposure is fast enough (shutter speed > 1/ longest focal length (e.g. for an 85mm lens, the shutter speed has to be 1/85 sec or faster (1/125 sec) to successfully hand hold the camera.
Personally, I use a tripod as a matter of course.
What camera mode to use?
It depends on what you’re used to, as all metering systems work the same in infrared.
Experiment with all modes. To get the quickest and most accurate histogram, try shooting in program mode, but you will need to remember to watch the aperture, as P mode resets to the widest aperture when turning the camera off and on. I will shoot on P mode for street shooting, as things can happen quickly, and taking time to set anything could result in missing a shot. I switch between Aperture priority and Program modes in all my work.

Turf Church, South Coast, Iceland — An example of photographing infrared in the rain where the whites become bright and tree bark goes dark when wet.
Since my first exposure to infrared as a child, I’ve developed and maintained an affinity for infrared. It wasn’t until recently that a point was reached to where hardware and software came together to help me achieve the look and feel to my work that I’ve been seeking. Enjoy your fantastic voyage into infrared-land.
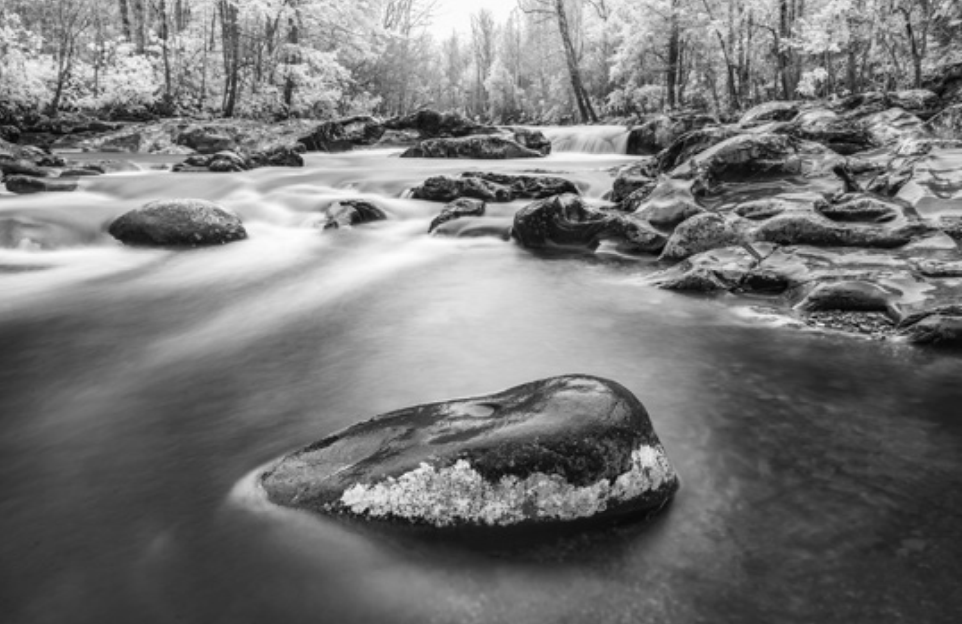
Pot Hole, Greenbriar, Great Smoky Mountains, TN — Image made during a persistent spring rain, making the rocks very dark and increasing the brilliance of the whites. Glow was added to the highlights using the NikDXOs Glamour Glow filter. A 10 stop neutral density was used to slow the water.

Hill Street, Whidbey Island, WA — I added a 10 stop neutral density filter to create the 4-minute exposure. Obviously, there was no wind, which is a rare event at this location.
Tony Sweet
Coming from an artistic background as a professional jazz artist and professional close up magician (sleight of hand artist), Tony has always sought creative, deeply personal endeavors.
The transition from jazz artist to nature photographer was a seamless transition as both require an improvisational nature and an ability to adapt to quickly changing conditions.
Tony was named as a Nikon Legend Behind the Lens and has been published worldwide for over 35 years. He has authored 8 books, contributing to many others, co-produced an educational DVD series, and teaches and lectures throughout the US, Canada, Iceland, and Cuba.
Tony is co-owner, along with Susan Milestone, of their Visual Artistry Location Workshops Series, Creativity Seminars, and 1 ON 1 virtual training sessions and ZOOM presentations to photographic societies worldwide.
Please visit URL: http://tonysweet.com
Email: tony@tonysweet.com