Recently I stumbled upon the compelling world of making mandalas from photographs. I’ve seen and admired mandalas over the years, from wall art to the amazing transitory sand mandalas made by Buddhist monks, but I’d never made one myself.
Although I do meditate from time to time, I’m not a hardcore meditator, and these meditation wheels just seemed way too complicated to make. I never imagined it could be done by manipulating a photograph!
Then I stumbled upon a process that works for me, and whether I meditate on them or just enjoy them as art, I’m mad for mandalas! (Warning: this can be addictive!)
How to create photo mandalas
So how do you transform a photo into a mandala?
The tools of the trade – Pixelmator
I’m working on a Mac using Lightroom, Photoshop Elements, and Pixelmator (free 30 day trial – otherwise $29). I don’t think Pixelmator is out for Windows yet, but it does run on iOS – so an iPad or iPhone will do.
*New Edit*
Subscriber Albert Happel just suggested a free version for Android users – thanks Albert!
![]()
If you are on Android device, user Albert Happel just shared that you can use a free app called “Camera MX” (link to Google Play Store) to do this as well.
Subscriber Tom Leparskas pointed out that a free Photoshop action for Photoshop users on any platform – thanks Tom!
You can get the Photoshop action on the Mike W Photoshop Actions site here. Scroll down until you see the ‘kaleidascope action’ set and download it from there. Since its free I would encourage you to send Mike W a tip by donating at the top of his page if you like it – do your part to support great free products like Mike W’s!
Here is a video showing how to install Photoshop actions – for any further questions about this software please email the creator instead of me :)
It’s a pretty old school looking site but its a Photoshop Action that can be used with PS2, PS3, PS4, PS5, PS6, and PS CC. *New Edit Over*
Finding a great starting photo
First I choose a photo. I’m still narrowing down what makes a good photo to make into a mandala. So far I look for the following in a source image:
- sharp focus
- deep depth of field
- texture and contrast
- natural colors
- no sharpening applied
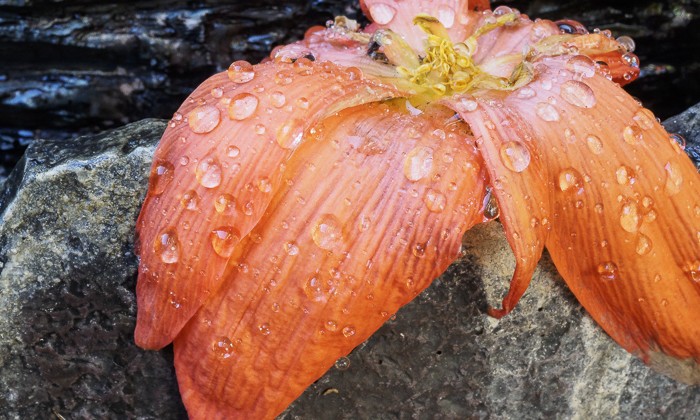
Composition seems not to be very important. Some of my favourite mandalas have been made from photos that were really “throw-aways”.
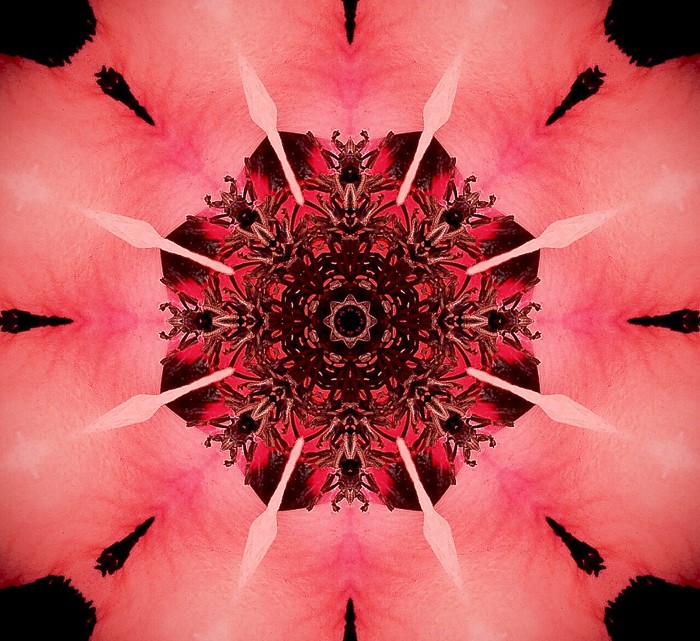
Lets look at an example
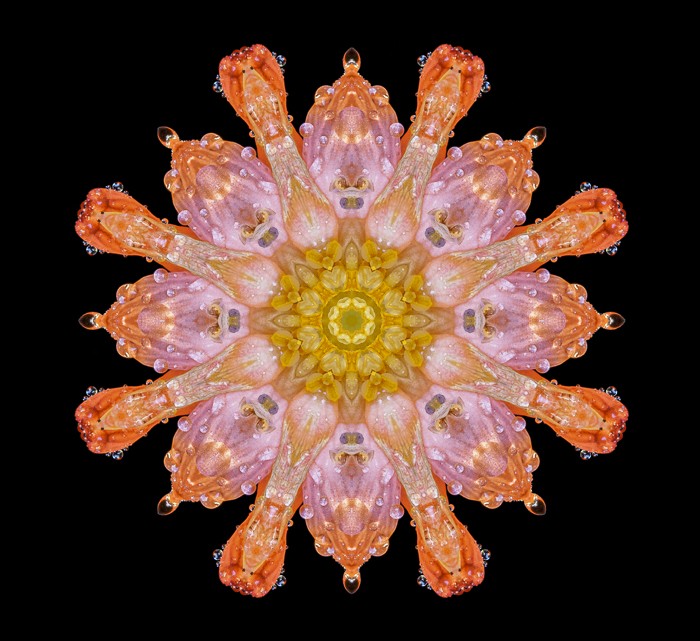
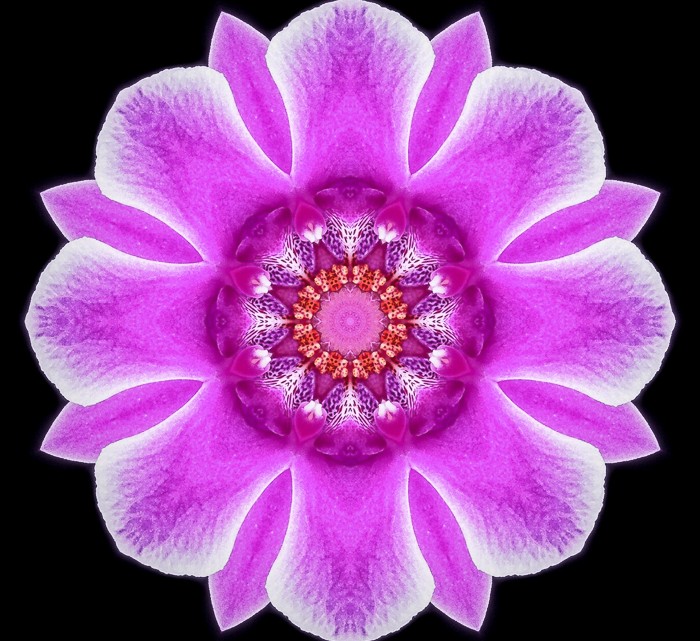
For example, this bedraggled rain-dotted flower (which I nearly threw away)
became this beautiful mandala:
Other photos can work well too!
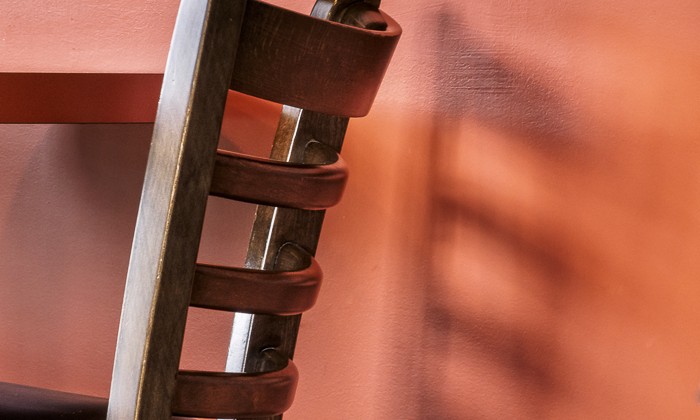
And while the colors and textures of nature are ideal for mandalas, other shots can work, too. Here’s a shot I did of a chair in a coffee shop, and the mandala that resulted:

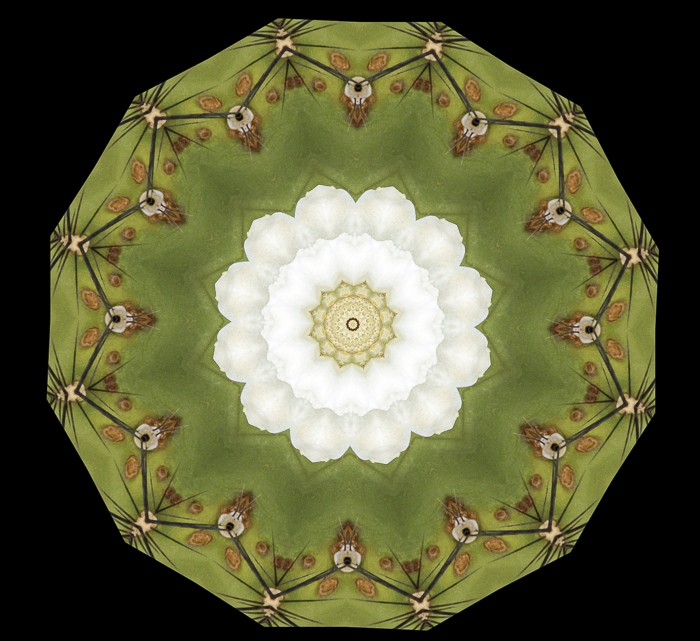
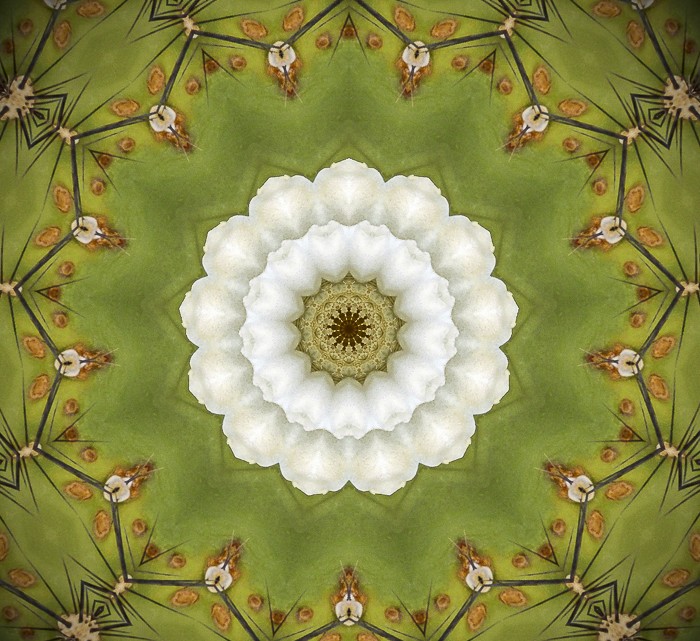
Black backgrounds, or no black backgrounds?
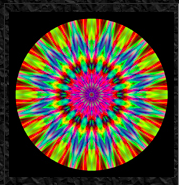
Some of my first mandalas didn’t have the black background, and while there’s nothing wrong with that, I prefer the mandala floating on a black background in most cases. Here are two mandalas made from the same shot of a saguaro blossom. Below, I’ll tell you how to make the black background.
Starting the initial photo editing
I start by opening my source image in Lightroom and adjusting exposure, white and black point, and clarity. Make sure you DON’T apply sharpening at this stage. You can tweak the saturation / vibrance at this stage or later. (And of course, if you do your basic edits in something other than Lightroom that’s fine.) Then crop to a square and export as a full size jpg file.
If you want a black or white background, open that file in Photoshop Elements or any program that will let you extend the canvas size. I usually add about 40% or so to the canvas size. If the original is 25 inches wide, I’ll expand the canvas to about 33 inches, for example. Then I fill the added canvas with black (or white), and save the image, again as a full size, full quality jpg.
Using Pixelmator
This is where the fun starts. For this next step I use Pixelmator, which is available through the Mac App store. I drag the image with its wide black border into Pixelmator and choose the “Kaleidescope” effect. Right away the image is transformed and if you’re really lucky, you may like what first comes up.
There are 2 sliders to play around with, and you can also drag the centre point around. There are literally hundreds of configurations. I generally play around with all the controls until I get an image I really like. Then I click OK on that, and grab the crop tool to crop the resulting canvas to a square.
As mentioned above you can also use the Kaleidoscope photoshop action to accomplish this as well.
If you prefer a mandala without the black or white border, just skip the step where you expand the canvas.
Final photo processing
Okay… you’re almost done. The next step is to take the mandala back into Lightroom or whatever program you use for basic edits, and tweak the exposure and white and black points as well as vibrance/saturation. This is also where you would apply sharpening as the last step. Voila… you have a mandala.
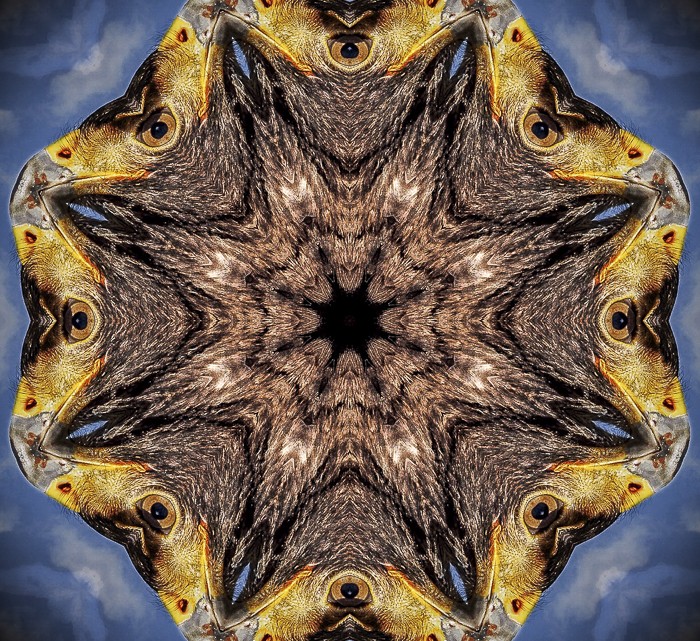
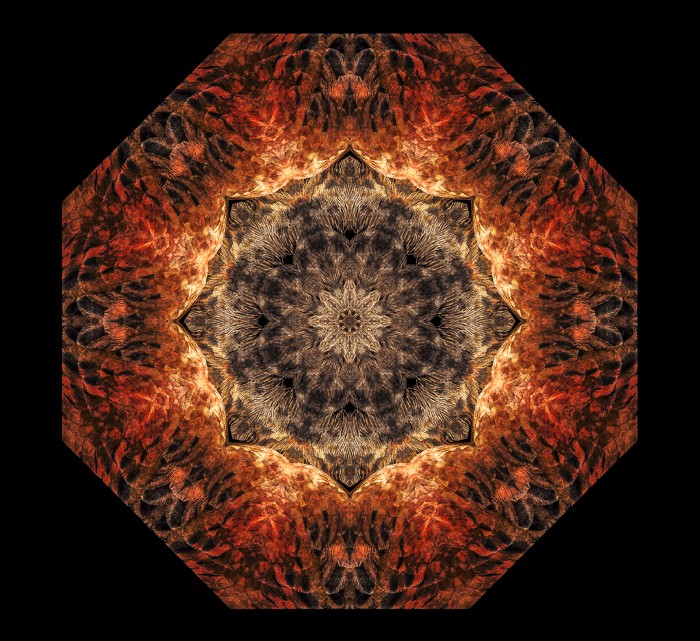
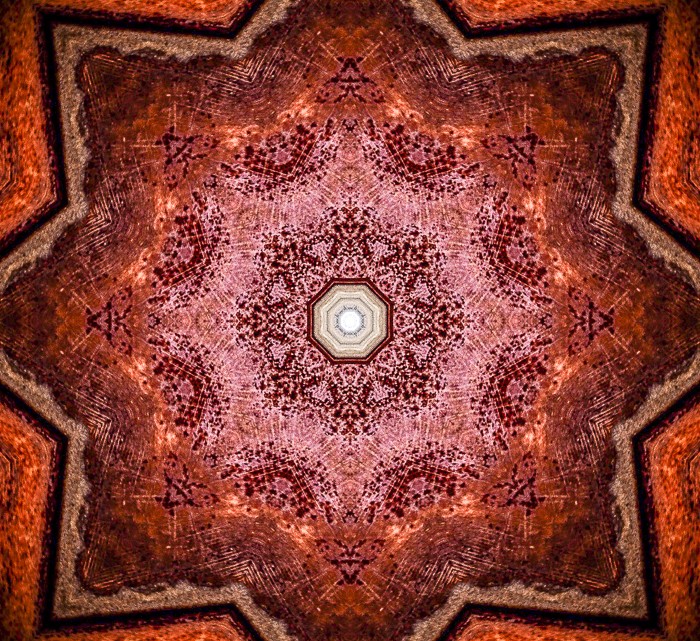
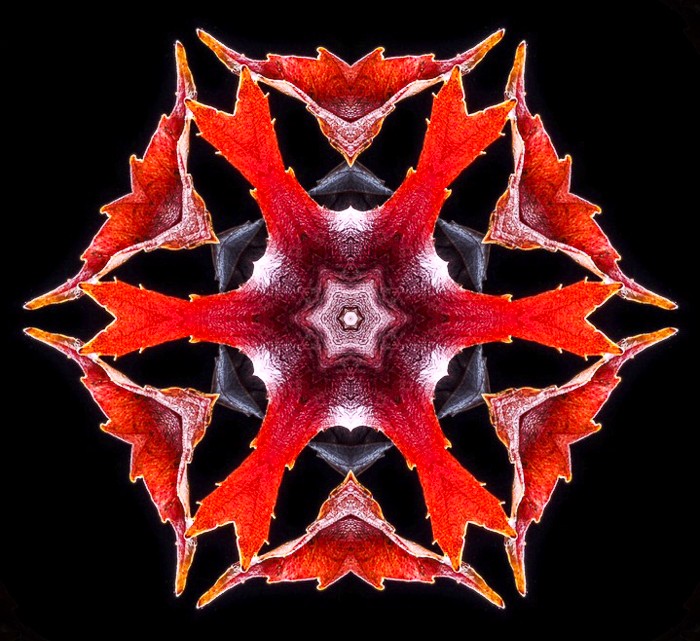
Here are a few more for you to enjoy, made from fall leaves, rusty truck doors, flowers, and birds. Have fun!
Judy Hancock Holland operates JHHphoto.com on Vancouver Island, BC, Canada. Visit JHHphoto.com or flickr.com/photos/judynanaimo to see more of her mandalas and other work.
All images © Judy Hancock Holland and JHHphoto.com. All rights reserved, used with Judy’s permission.

Great idea. I do not have a mac, so I am hoping someone has an idea of what might work for PC or an Android tablet.
This looks amazing!
Wow, beautiful you guys. Awesome tutorial!
Thanks for sharing Judy. I can’t wait to try this, in just a few minutes – LOL. I like that you pointed out that a throw a way photo was used. I save many photos because I find I can use different elements of them.
Looks nice, too bad I have Windows
Judy,
Very nice mandalas. Thank you for sharing the process to make them. I will give it a try.
Wow! Fantastic! However, I need to be able to do this in Windows 7, perhaps using Lightroom 6. I’ve searched for the past 90 minutes but can’t find anything for Windows or LR! Too bad!!
Gene
Judy – I happen to be looking for a stock photo of a mandala for a friend’s business card I’m creating. Now I can make my own and not have to buy a license. Your work is beautiful, hope mine come out half as nice. Thanks for sharing!
You can use GIMP to get a black background. for those not familiar, GIMP is the free version of Photoshop. It does not have everything Ps does but does come close. The user interface is not intuitive but is is a good alternative for those of us that are not in the CC or Adobe cloud.
I believe you can also do this in On1 Photo suite in the Effects module.
I am so glad for this tutorial because I am going to try this -such a pretty and cool effect and I can get more mileage out of my flower photos. I participate in a floral meme each week and this will stretch my photos.
Great recommendations Abrianna, thank you for sharing with the group!
Awesome! I’m glad to see that Judy could help you out on this!
Hi Gene,
We just found a solution! One of our awesome subscribers just wrote in with a tip on a free Photoshop action that can accomplish this vs. using Pixelmator. Check out the post again which provides a link to download the software and another Youtube video link on how to import it into Photoshop (if you have Photoshop).
Hi Mark,
We just found a solution! One of our awesome subscribers just wrote in with a tip on a free Photoshop action that can accomplish this vs. using Pixelmator. Check out the post again which provides a link to download the software and another Youtube video link on how to import it into Photoshop (if you have Photoshop).
Hi Carol,
We just found a solution! One of our awesome subscribers just wrote in with a tip on a free Photoshop action that can accomplish this vs. using Pixelmator. Check out the post again which provides a link to download the software and another Youtube video link on how to import it into Photoshop (if you have Photoshop).
Remember folks… This works with all kinds of photos, not just flowers. Some of my favourites have been made from rusty old vehicles. Try anything. Some you will toss out, but some will surprise and delight you. Have fun!
Judy,
Thanks sooo much. Yes, this is very addictive. I use Windows, but have just played for an hour on my mini ipad.
Love it. Thanks so much for making this blog.
This could be my next entry for camera club using topic “creative’ Hope this is a secret, down my way :)
Thanks Cheryl
Hi Cheryl, I updated the post about 30 minutes ago with a link to a Photoshop action that accomplishes the same thing as Pixelmator for free (if you have Photoshop)
Thanks Tom Leparskas for the PS action tip. I can’t try it out, as I don’t have Photoshop. I’m curious… Does it allow you to shift some variables to create a number of different effects and then choose the one you want?
This was so much fun. I created a beautiful mandala from of all things, a flamingo! I’m just learning to use PS and was able to increase the size of the canvas, but could not change the color, so my mandala has a white background, but it is still pretty. By the way, I did use Photoshop Action and it worked beautifully. Which I could show you my finished product.
An Android option is the Kaleidescope effect built into the MX Camera app. I’ve created hundreds of interesting images using all manner of subject matter.
Thanks absolutely briliant
Thanks Denis, Judy is pretty awesome :)
Great suggestion Albert – thank you for sharing! I’ll add that to the post as well.
Hi Dolores,
Thanks for writing! I’m glad you enjoyed this post and would like to see your flamingo photo! Let me figure out a way to improve my commenting system so you can do that. In the meanwhile you can certainly post up the photo on the Hacking Photography Forum group on Facebook: https://www.facebook.com/groups/hackingphotographyforum/
I have joined the fb group and my acceptance is pending. When you approve it, I will post both the photo of the mandala and the photo I used to create it.
Hi there,
people who also using corel photo paint they can also use kaleidoscope plugin made by mehdi.
http://mehdiplugins.com/english/kaleidoscope.htm
Unfortunately it doesn’t work with with photoshop.
Regards
Ute
Judy,
Thanks for sharing this tip, as well as thanks to the edits offered here.
In your instructions you mention 2 sliders in Pixelmator. I cannot see those sliders. When I apply the filter, there’s only one slider. The same is true for moving the center around. That option does not appear for me. Are the sliders and option to move the center only available in the paid version. I’m currently using the trial version.
Thanks again for your tip! This is great.
Thanks for approving me for the site. I have posted my mandala there.
Awesome, thank you for pointing this out Ute! I love that you guys are so resourceful and have found a way for just about anyone using any program to be able to use this tutorial.
I just saw your flamingo mandala and it looks great!
Egidio – Are you using a Mac or and iPad/iPhone? On the iPad/iPhone there are no sliders; you just move your finger around and experiment. On the Mac there should be a “count” and “angle” slider as soon as you choose the “Kaleidoscope” effect from the menu that comes up on the left. It will make an initial image automatically, and you move the sliders as well as the centre point to change the image to your liking. Give that a try, and have fun.
Judy, I’m on a Mac. I thought that was odd, too. On my Mac it only shows a slider for “Time.” Would the other sliders be in a different window? I downloaded the trial version from the Pixelmator site. It is Version 3.4.2 Twist (51215).
Egidio Leitao – I’m stumped on this. Suggest you contact Pixelmator tech support with your question. Sorry I can’t be of more help. Mine is the same version as yours, and it has 2 sliders as soon as I click “Kaleidoscope”.
Judy,
I think the difference is in the free vs. paid versions. Last night I was reading my Mac|Life magazine and saw an ad from Pixelmator for giveaway special for Mac|Life readers. I took advantage of that and downloaded Pixelmator. The version number is the same, but the Kaleidoscope effect does show both sliders, as you pointed out in your article.
Thanks again.
I just had a play with this and it’s wonderful – and so super easy! I think these would make wonderful, unique gifts! Thanks for the article Judy.