Photography should be fun and everyone should be able to enjoy taking great shots. When you first start out Photography can seem like a whole new language and all the extra knobs and dials on your DSLR can be overwhelming.
In this article I am going to walk you through the basic settings and how they affect your shots without all the complicated science and waffle. I want you to read this and feel inspired to grab your camera and choose your own settings to take great shots.
Let’s start at the beginning. Taking pictures is all about using the available light and your camera uses its ISO, aperture, and shutter speed settings to do this. These three settings are all linked, changing one setting means you’ll need to change another to compensate for it.
What is ISO?
ISO is all about how sensitive your camera is to light. The higher the number the more sensitive your sensor is to the light that hits it.
As a rule try to keep your ISO as low as possible. As you raise the ISO the picture may become grainy this is called digital noise.
If low ISO is best why change it?
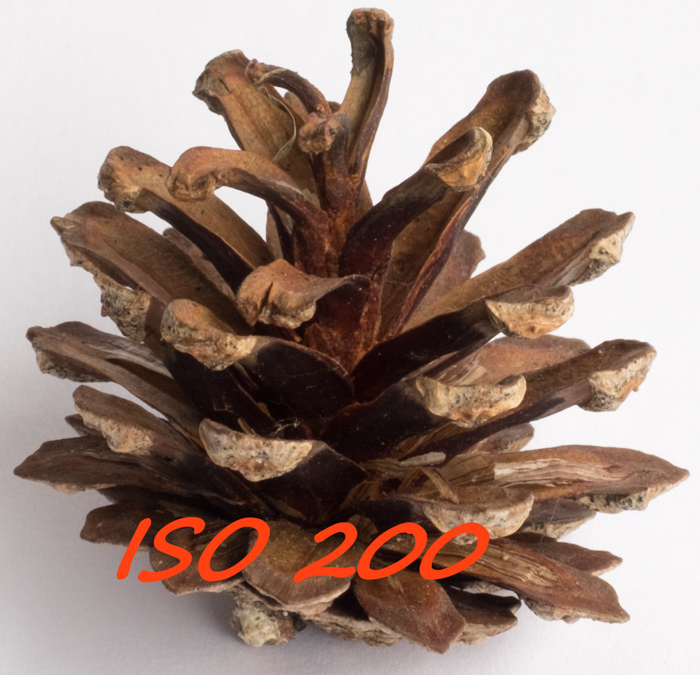
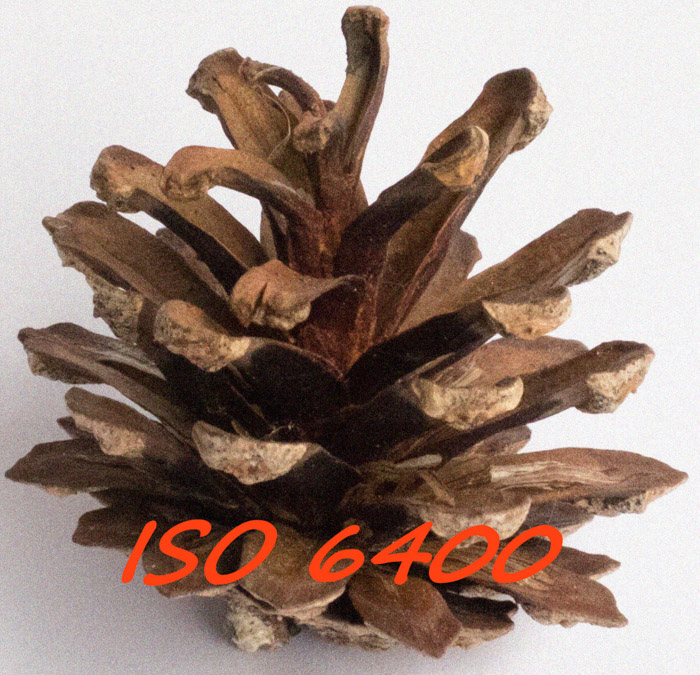
Sometimes a high ISO is necessary. In low light levels or with fast shutter speeds your camera needs to be more sensitive to catch the light, this means raising the ISO. The high ISO will effect image quality, look at the pine cones above to see Noise.
Tip
Always keep your ISO as low as possible to avoid noise, but if your shutter speed is running slow risking blur raise your ISO.
Try This
Take your camera into a room on a sunny day and close the curtains. Take the same shot but use your highest, lowest, and middle ISO.
Priority modes
You don’t have to go straight from the security of using auto and letting the camera do all the work to choosing all your settings yourself. You can choose a priority mode.
Priority modes let you choose one setting whilst your camera does the rest of the work. They are a great tool to help you step away from auto and improve your images.
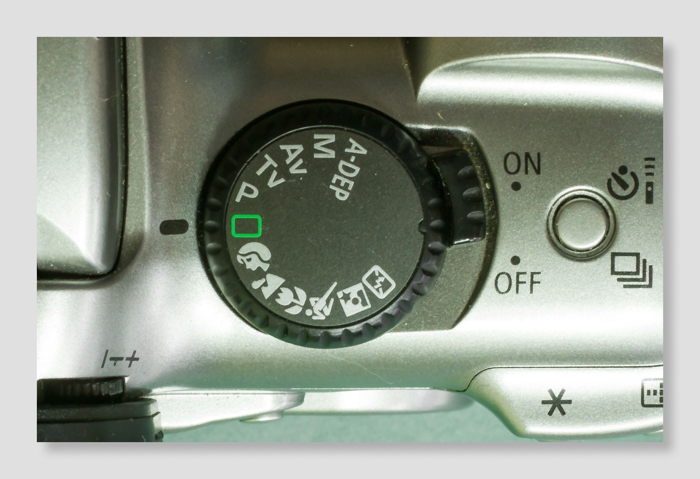
Set your camera to shoot in aperture priority by selecting Av on the control dial. You can set your camera to shutter priority by choosing Tv or S.
Aperture and what it does
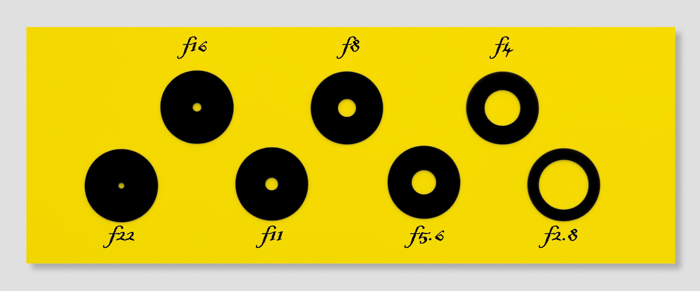
Lets look at the two shots below. They were taken with exactly the same set up, lighting and camera position. The only thing I changed was the aperture setting (f number).
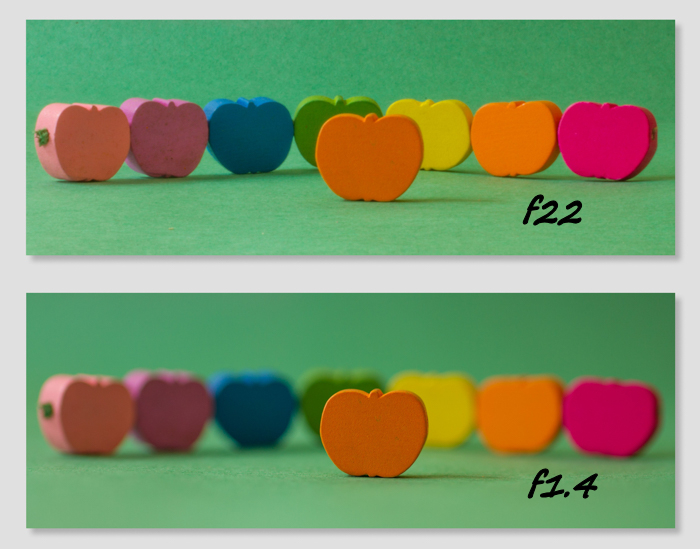
Everything is in sharp focus in the top shot. This style of shot is great for landscapes and capturing all the details. It was taken with a high f number.
The front apple is in focus in the bottom shot against a blurred background. This is a great trick for blurring messy backgrounds, making one person stand out in a crowd or just keeping focus on your main subject. To do this you need a low f number.
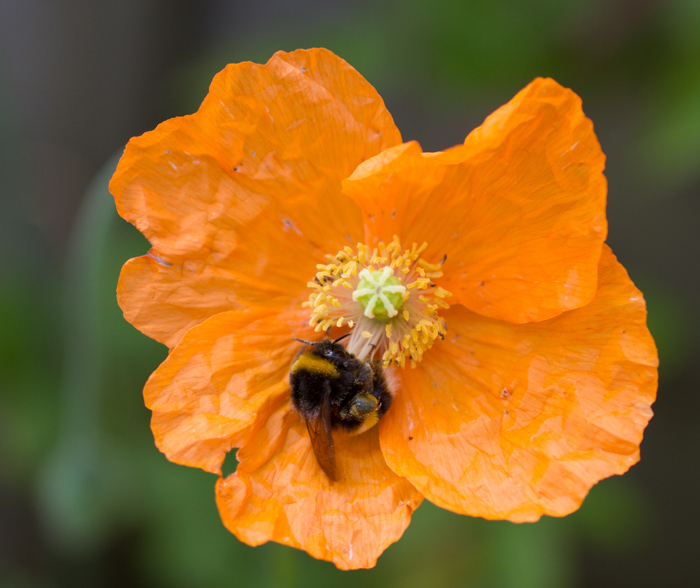
With this shot I wanted all the focus on the Bee and the poppy and not the messy garden behind. I chose f2.8 to keep the poppy sharp and blur the background.
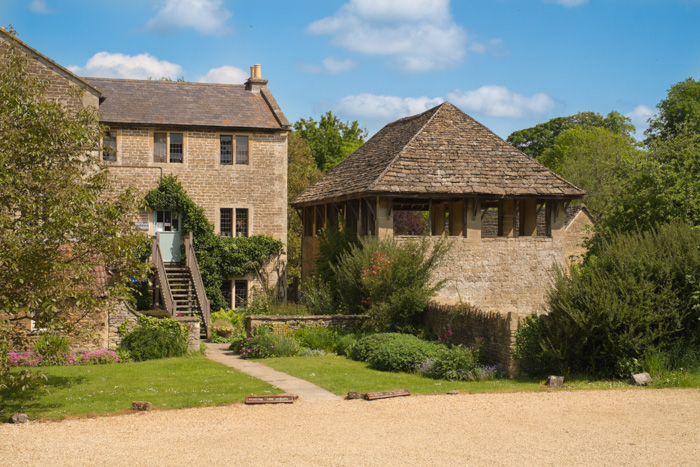
This shot is a typical English Scene and I wanted to keep everything in focus. I chose f13 to keep everything sharp.
Now it’s not that simple, changing the aperture alters how much light enters your camera. With a high f number less light enters and your camera will compensate by slowing down the shutter speed. Be prepared for this and stabilise your camera, raise the ISO setting or add extra light.
Tip
Low f numbers work well in portraiture, not only do they blur the background but they help you keep the shutter speed up.
Try this.
Set your camera to aperture priority and take a shot of your favorite mug on the table. Shoot in good light and alter the aperture to change how much is in focus.
Does shutter speed matter?
Yes! Shutter speed affects the amount of light hitting the sensor. It can also help you freeze or show motion. Use shutter priority when it’s the motion that’s important, either the motion of your camera or the motion of your subject.
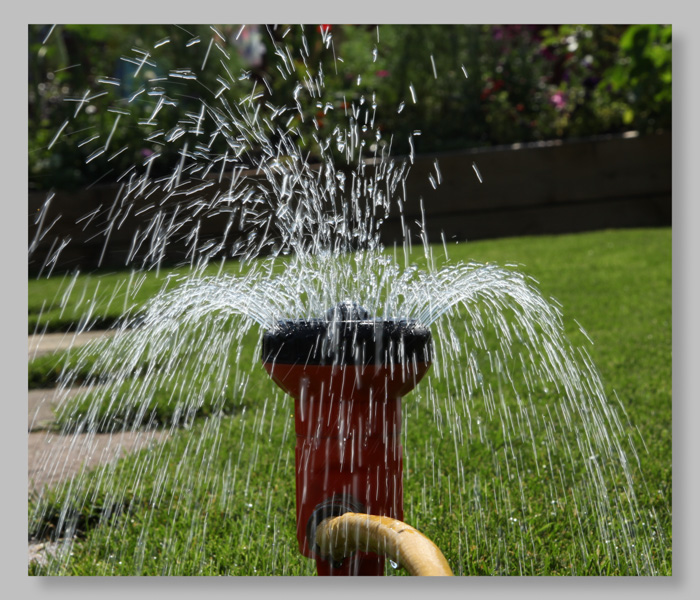
Moving water is a great subject when learning to use shutter speeds to show motion or freeze action. In the first shot here I froze the motion with a fast shutter speed 0f 1/3200. In the next shot I slowed the shutter speed down to 1/80 so I could show the motion of the water.

Tip
Be prepared to raise the ISO to maintain a good exposure, particularly fast shutter speeds on overcast days.
Try this
Set your camera to shutter priority and head out into the garden with a sprinkler. Try to replicate the shots above by first freezing the water droplets and then blurring them.
What does exposure compensation do?
Are your photos too dark? Do the colours look washed out? Is detail missing in either dark or light areas?
At the end of the day a camera is only a machine and can’t think for itself. This might mean it makes a mistake with the exposure calculations.
You can combat this by changing the exposure compensation (Ev) to either a plus or minus value. If the shot’s too bright move the compensation towards the minus numbers. If it’s too dark take it into the plus numbers.
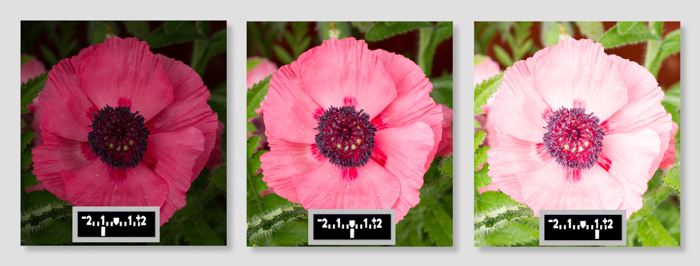
I took all three of these photos as the same time, the only thing I changed was the exposure compensation.
Tip
Check your camera LCD screen after each shot to check for the correct exposure.
Try this
Go outside and pick a flower in the lawn. Take the same photo but change the exposure from -2 to +2 to see how exposure effects your shot.
Final Tip – camera shake
Even the steadiest hands shake a little. I can’t stress enough how important it is too hold your camera steady, no amount of choosing settings is going to help if you shake your camera and blur your image.
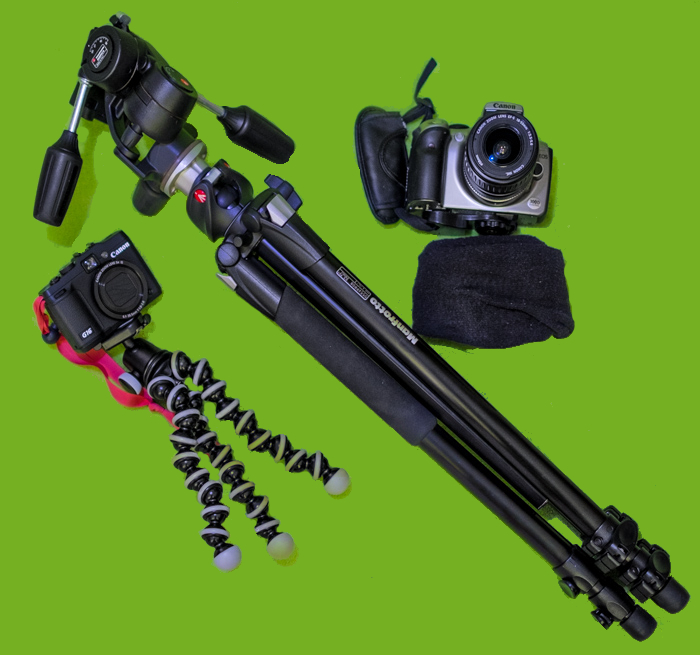
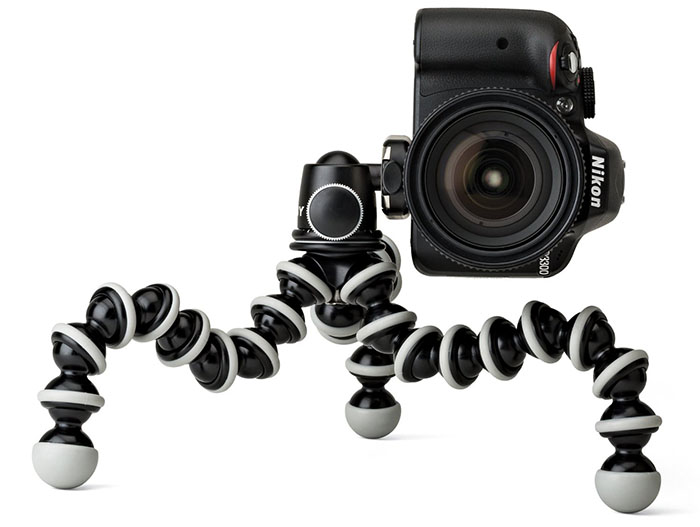
For long shutter speeds I use a tripod or Gorillapod. You could carry a beanbag to rest your camera on, it’s simple to make your own with a bag of rice and a sock. Don’t be afraid to lean on walls and tables to brace yourself.
*Edit from Mike Newton: I used a Gorilla Pod during a two-week trip to Italy and it was amazing. Super compact, easy to travel with, and enabled me to wrap it around railings, tree branches, you name it! I’d highly recommend one*
Finishing up
Now of course there’s a lot more to camera settings than I have shared in this article. But I want you to get out there and use your camera without getting bogged down in all the technical stuff.
You can always come back later and learn the whys and hows but for now grab you camera and start turning those dials. Start with one priority mode and explore it as much as you can before moving on but remember – if it all gets too much turn back to Auto :)
You don’t mention how depth of field differs depending on the size of the sensor. My f2.8 has a depth of field equivalent of f8. So, I can’t blur the background to any significant amount. Nothing like your demo pictures.
No loss for me because I shoot landscapes mostly.
Hi Stan.
You’re quite right about the relationship between sensor size and effective focal lengths. The reason I didn’t mention it is because there are several factors that have an effect on the depth of field and the purpose of the article was to give an overview of a camera’s controls.
Ah so thats what they all mean :D haha. Thank you for the simple tips and description. Very useful!
I’m glad it helped!